Bootcamp Week 3
Bootcamp Week 3 - Learning AngularJS
Well, week 3 has come to and end. It’s hard to believe I’ve already been in bootcamp for 3 weeks. The days are flying by, with each one feeling like and exercise in how to drink out of a firehose.
This week was all about AngularJS. Version 1.5.6 to be specific. If you are unfamiliar, basically AngularJS is an open-source javascript framework, created by a guy at Google, that allows you to build dynamic web apps. It extends HTML syntax to allow you use some powerful features without writing nearly as much javascript code as would have been required normally.
Setting up AngularJS for use requires a few steps:
First, you have to add AngularJS to your html file. The quickest and easiest way to do this is via CDN. Once you have the CDN link, you need to paste it either in the header of your document or just before the closing body tag.
<script src="https://ajax.googleapis.com/ajax/libs/angularjs/1.5.6/angular.min.js"></script>
AngularJS is capable of a whole bunch of cool things which allow you to add dynamic effects to a page. In order to add these, you use something called a directive. A directive is added to your HTML tag.
In order to begin using AngularJS, you have to start by adding a directive called “ng-app” to the opening body tag. You will also add another directive called “ng-controller” which ties into the javascript file. Controllers are basically javascript functions that communicate with the index.html, or “view,” to manipulate items within the index. In the case of the project I was working on, ng-app was named “app” and ng-controller was named “serviceController.”
<body ng-app="app" ng-controller="serviceController">
serviceController contains all of the functions and data we need to work with with the index.
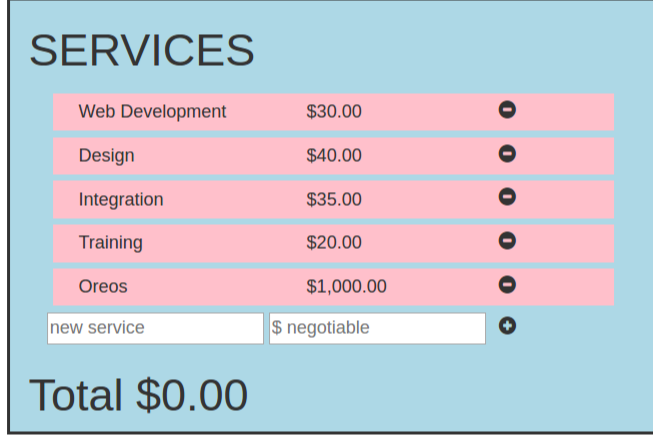
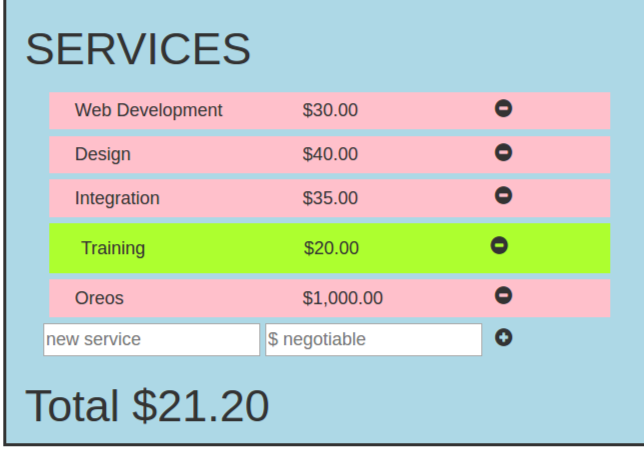
In the project, my team was trying to figure out to use AngularJS to add styling, which was something we had never done. We had built an order form with services which could be purchased and wanted the styling to change when the user clicked on a particular item. We wanted the styling to go from a pinkish color to a yellow-green color on click:
Before:
After:
In order to do this, first we had to add another AngularJS directive called “ng-click.” Ng-click tells Angular to do something whenever a user clicked on the tagged element. In this case, first we used ng-click to call a function which named serviceSelect(service).
ng-click="serviceSelect(service)"
This called the function:
$scope.serviceSelect = function (served) {

if (served.selected == false) {
    $scope.total += served.price;
} else {
    $scope.total -= served.price;
}

served.selected = !served.selected;
};
The “if/else” statement in the function pertains to adding or removing the cost of the item, which we will ignore for this post. What needs to be focused on for this post is this portion:
served.selected = !served.selected;
When the item is clicked in the index, this snippet toggles the service as either being selected or not selected. When this happens another ng directive becomes important:
ng-class="{selected:service.selected}
This ng-class directive affects the CSS on the item. It requires curly brackets, {}, in order to work. The “selected” portion refers directly to a CSS class in our stylesheet:
.selected {
background-color: greenyellow;
padding: 10px; }
This causes the service clicked to add a greenyellow background and also the padding. Tada!